
Chemistry is a fascinating subject. And what better way to learn than through science experiments?
Here are 8 hands-on science experiments for kids over the school holiday. These experiments are great for older children, or with assistance from mum or dad. They can be done at home with ingredients you already have on hand.
So pick an experiment, and grab your lab coats to get started!
1. Cabbage chemistry
2. Lolly fountain
3. Bath bombs
4. Sherbet
5. Rubber egg
6. Crystals
7. Slime
8. Snot Slime
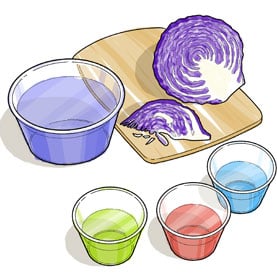
Cabbage chemistry
Follow these instructions to learn about acids and bases using red cabbage.
Safety: This activity requires the use of a knife, poisonous chemicals and hot water. Ask an adult to assist you. Always follow the safety advice on the products you are using.
You will need
- fresh red cabbage
- sharp knife
- cutting board
- hot tap water
- 7 clear plastic disposable cups
- 7 plastic spoons
- large plastic bottle
- range of the household substances which may include:
- strongly acidic, e.g. powdered toilet cleaner
- acidic, e.g. vinegar, lemon juice, white wine, lemonade or citric acid
- weakly acidic, e.g. cream of tartar
- neutral, e.g. pure water, shampoo or baby shampoo
- slightly basic, e.g. bicarbonate soda
- basic, e.g. milk of magnesia, washing soda or floor cleaner
- strongly basic, e.g. dishwasher liquid or powder
What to do
- Using a sharp knife and cutting board, finely slice three or four red cabbage leaves.
- Place the cabbage leaves in the plastic bottle, half fill the bottle with hot water and screw the lid on tightly.
- Shake the bottle for a few minutes until the water becomes a deep purple colour. Leave the solution to cool.
- Strain the solution and add sufficient water to the solution to make about 1 L.
- In each of the cups, place a small amount of one of the above household substances in the following order: strongly acidic; acidic; slightly acidic; neutral; slightly basic; basic and strongly basic.
- Now half fill each cup with the red cabbage water and stir the solution. If arranged in order, the jars should display a spectrum of colours from cherry red (strongly acidic), pink-red (acidic), lilac (slightly acidic), purple (neutral), blue (slightly basic), green (basic) and yellow (strongly basic).
What’s happening
The things we eat and drink are all acidic, and the things we use for cleaning are basic. This is because basic substances taste unpleasant, but a cleaning agent usually needs to be basic to remove dirt and grease.
Substances that are acidic or basic make the eyes sting, so baby shampoo is made neutral.
Acids
Acids are a very common group of chemical compounds, many of which occur naturally. Acids can be strong or weak.
Citric acid, which occurs naturally in lemons, is a weak acid. Hydrochloric acid (used for soldering) and sulfuric acid (battery acid) are very strong acids.
Bases
Bases (often called alkalis) are another group of chemical compounds that have different chemical properties from acids. When bases and acids are added together, they will neutralise each other’s properties.
We describe whether things are acidic, basic or neutral by using a scale called the pH scale. The pH scale ranges from zero to 14. A substance with a pH of:
- 0 is a very strong acid
- 3 – 5 is a weak acid
- 7 is neutral
- 8 – 9 is a weak base
- 13 – 14 is a very strong base.
Pure water has a pH of seven and is regarded as neutral.
Acids and bases can be detected by a group of chemical compounds called acid-base indicators. One of the first known naturally occurring indicators was a type of lichen called litmus. (Lichens are plant-like growths that are often found on rocks and tree bark.) Litmus turns red in the presence of an acid or blue with a base.
Most indicators used today to detect acids and bases are man-made. However, many plant pigments, such as the red cabbage you used, contain chemicals that act as acid-base indicators.

Looking for more science resources?
There are over 120 science e-books in the Reading Eggs Library to read and explore.
Lolly/Candy fountain
Learn more about gases by creating a soft drink fountain using lollies/sweets. What a sweet way to find out more about chemistry!
You will need
- Roll of lollies/sweets (mint lollies/sweets work well)
- 2 L bottle of soft drink
- Piece of paper or a tube for the lollies/sweets
- Outdoor area
What to do
Do this activity in an outdoor area.
- Open the bottle of soft drink and place the bottle on the ground so it will not tip over.
- Roll up the paper into a cylinder that’s just wide enough for the lollies to slide through.
- Put your finger over the bottom of the roll and ask your friend to put the lollies into the paper tube.
- Hold the tube of lollies just above the bottle and remove your finger so all the lollies drop straight in. You need to drop all the lollies into the bottle at the same time.
- As soon as you have done that, move away from the bottle as quickly as possible.
Hints
- Diet soft drink works just as well and is less sticky to clean up as it contains no sugar.
- Orange soft drink doesn’t always work. Neither does Solo as it is light on fizz.
- Experiment with different types of lollies – Kool Mints were used in this activity. Try Mentos or other sugar coated lollies.
- Experiment with the soft drink at room temperature or from the fridge.
What’s happening?
Soft drink is bubbly because carbon dioxide gas has been forced into the bottle under pressure.
Until you open the bottle, the gas mostly stays dissolved in the liquid and cannot expand to form bubbles, which the gas will do when not under pressure.
If you shake the bottle and then open it, the gas escapes with a whoosh, taking some of the soft drink along with it. Adding anything to a soft drink enables more bubbles to form and escape.
Try stirring soft drink with a spoon – it gets less fizzy.
The lollies provide lots of surface area very quickly, which means the bubbles of gas form very rapidly in huge numbers.
You need non-smooth surfaces to enable the gas to form.
Both sand and sugar have the same effect when dropped in soft drink.
When you look at a glass of soft drink, there are normally just a few streams of bubbles coming off specific points on the glass where the surface is uneven.
Sometimes you see a stream of bubbles coming from the middle and if you look carefully you can often see a piece of dust with bubbles coming off its end.
The place where the bubbles start to form is called the centre of nucleation.
As the lolly dissolves, it forms hundreds of nucleation points which are tiny pits on the surface of the lolly where more carbon dioxide bubbles can form.
When all this gas is released, it thrusts the entire contents of the bottle skyward, in an incredible soft drink blast.
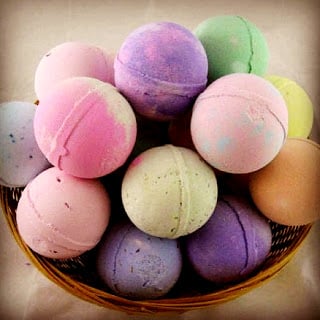
Make your own bath bombs
Follow these instructions to make your own bath bombs and learn about science while having fun in the bath!
You will need
-
food colouring/coloring
-
flower petals or body glitter
-
sweet almond oil
-
scented oil such as lavender oil
-
10 tablespoons of bicarbonate of soda
-
3 tablespoons of citric acid
-
2 large mixing bowls
-
1 large muffin tray
-
1 small glass jar
-
rubber gloves
-
spoon
What to do
-
Grease the sides and bases of a large muffin tray with a small amount of almond oil.
-
Place the citric acid and bicarbonate of soda into a large bowl. Mix the ingredients together well, to form the base mixture.
-
Scoop out about half a cup of this mixture and put it in into another bowl. This will make about one or two bath bombs (depending on the size of the holes in your muffin tray). You could also use old plastic containers or anything that will hold a shape.
-
Add the flower petals or body glitter to the base mixture.
-
In the small glass jar, mix together 6 drops of your scented oil, 5 teaspoons of sweet almond oil and about 10 drops of food colouring.
-
Gradually pour the oil mixture into the half cup of the base mixture. While wearing rubber gloves, quickly mix it all together. The mixture is ready when it stays together in your hands without crumbling too much.
-
Spoon the mixture into the muffin tray. Press it down firmly.
-
You can use the rest of the mixture with other types of scented oil or food colouring to make more bath bombs.
-
Leave the bombs in the tray to set for a few days.
-
Carefully up-end your bath bombs to remove them from the moulds.
-
Run a bath, hop in and drop a bomb. Watch it fizzzzzz!
What’s happening?
When the bath bomb dissolves in water, there is a chemical reaction between the citric acid and the sodium bicarbonate. The result is called sodium citrate. During the reaction, carbon dioxide is released. This causes the ‘fizzing’ that you see, similar to that in carbonated water.
The sweet almond oil is released during this reaction. It will form a thin layer on your skin which can help to moisturise/moisturize it. The lavender oil is for fragrance.
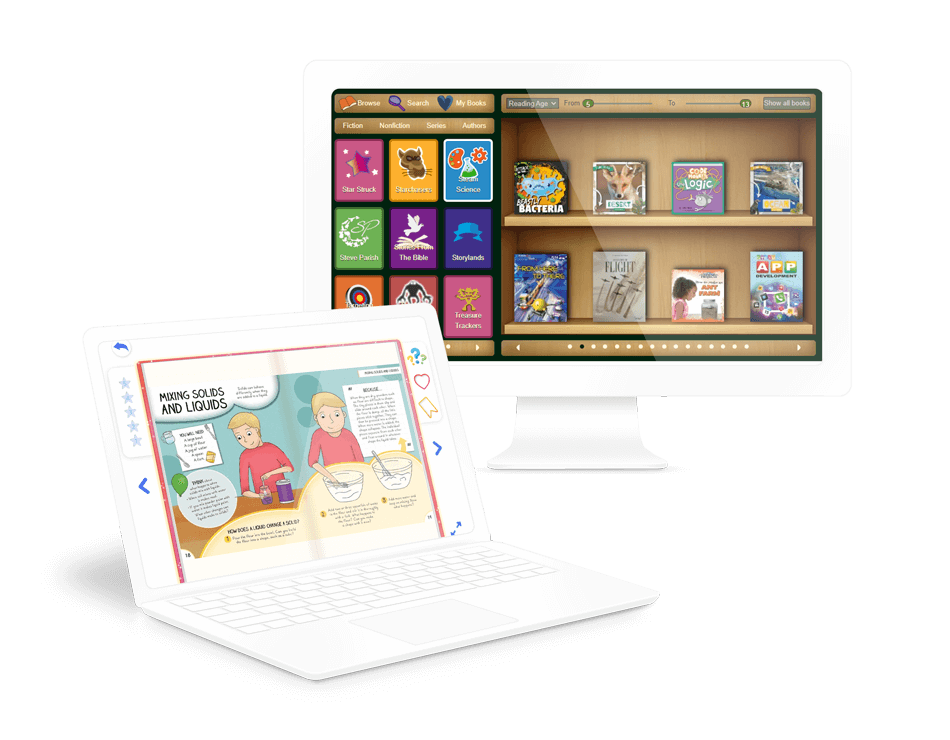
Wait, there’s more science experiment books in the Reading Eggs Library!
How to make sherbet
Follow these instructions to create an acid-base reaction in your mouth!
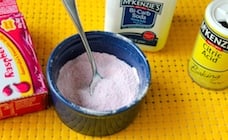
You will need
- icing sugar
- citric acid
- bicarbonate soda
- flavored/flavoured jelly crystals
- teaspoon
- dessert spoon
- small mixing bowl
- small snap lock bag.
What to do
To make sherbet you will need to:
- add 1 level teaspoon of citric acid crystals to the bowl
- add 1 level teaspoon of bicarbonate soda to the bowl
- now add 3 heaped dessert spoons of icing sugar
- add at least 2 level dessert spoons of jelly crystals (or more to taste)
- place a small amount, about half a teaspoon on your tongue
- after tasting you may need to vary the ingredients. If it is too bitter add more sugar, if there isn’t enough fizz you may need to add either bicarbonate soda or citric acid. Make sure you add only in small amounts, remember you can always add more but it is very hard to remove some.
What’s happening?
You have just created an acid-base reaction in your mouth. When you combine an acid (in this activity the citric acid) and an alkaline (the bicarbonate soda) with saliva they mix together to create a gas in the form of lots of tiny bubbles.
This is called an acid-based reaction and it’s what gives sherbet its fizz. You are actually feeling the sensation of carbon dioxide bubbles on your tongue. These are the same bubbles that are in fizzy drinks.
The icing sugar is needed to add sweetness as the citric acid and bicarbonate soda are quite sour. Citric acid is one of the acids found in lemons, oranges and limes. That is why they are called ‘citric fruit’.
The other acid in lemons and other citric fruit is called ascorbic acid. This is commonly known as vitamin C. The jelly crystals simply add flavour.
Rubber egg
Follow these instructions to make an egg bounce while learning about chemical reactions.
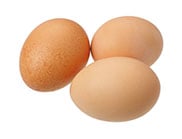
You will need
- hard-boiled egg, with shell on
- glass of vinegar.
What to do
To make your eggs bounce you will need to:
- Put the egg into the vinegar – you should see bubbles start to form on the egg.
- Leave the egg undisturbed for at least a day. You should see some wonderful scum form.
- Take the egg out of the vinegar and rinse it with water. The shell will rub off.
- Give the egg a poke with your finger and squeeze it gently.
What’s happening
Vinegar, or dilute acetic acid, ‘eats up’ the calcium carbonate in the egg shell, just leaving the inner membrane, or skin, of the egg behind. As the calcium carbonate is responsible for making the shell hard, the vinegar soaked egg feels soft and rubbery.
When calcium carbonate (the egg shell) and acetic acid (the vinegar) combine, a chemical reaction takes place and carbon dioxide gas is released. That’s why you see the bubbles.
The chemical reaction keeps happening for about a day until all of the calcium carbonate in the egg is used up. Calcium carbonate is in eggshells, seashells, limestone, and many other materials.
Let’s have a closer look at the chemical reaction. Calcium carbonate’s formula is CaCO3 and acetic acid is CH2COOH.
So the reaction is: CaCO3 + CH2COOH -> Ca2+ (in the form of a salt) + H2O + 2CO2.
The calcium ions (Ca2+) float free in the solution. Ions are atoms or molecules that have an electric charge due to the loss or gain of electrons.
Applications
Limestone is a sedimentary rock that is largely made of calcium carbonate. It is ordinarily white, but may be coloured by impurities; iron oxide making it brown, yellow, or red and carbon making it blue, black, or grey. The texture varies from coarse to fine.
Most limestones are formed over thousands of years from the skeletons of marine invertebrates. Among the important varieties of limestone are marl, chalk, oolite, travertine, dolomite, and marble.
Acid rain causes reactions like the ones in this activity. One kind of acid rain can come from air pollution caused by burning fuels that have sulfur atoms, which when burnt produce sulphur dioxide gas.
When the sulfur dioxide mixes in with rain, it turns to weak sulfuric acid. When the acid rain hits the limestone it slowly makes it fall apart, like the egg shell did. People use limestone in buildings and statues.
This is why over time, buildings and statues are being damaged by acid rain.
If you collect small rock samples and drop them in vinegar, you may see bubbles appear, like they did on the egg. The presence of bubbles indicates that calcium carbonate may be present in the sample.
Calcium carbonate reacts with acids to produce carbon dioxide gas, which we observe as bubbles. This is called the ‘acid test’. The ‘acid test’ is one of many tests that geologists use to determine the identity of a rock sample.
Creating Crystals
You will need
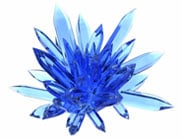
- Sugar
- Salt
- Bicarbonate soda
- Warm water
- 3 eye-droppers
- 3 spoons
- 3 plastic containers or bowls
- Measuring cup
- 3 small plastic cups
- Marker
What to do
- Label the containers ‘sugar’, ‘salt’ and ‘bi-carb’.
- Pour half a cup of warm water into the container labelled ‘sugar’.
- Add a spoonful of sugar to the water and stir until dissolved. Keep adding sugar until no more will dissolve.
- Repeat Steps 2 and 3, but with the salt instead of sugar.
- Again repeat Steps 2 and 3, but this time with bi-carb soda instead of sugar or salt.
- Label the small plastic cups ‘sugar’, ‘salt’ and ‘bi-carb’.
- Use separate eye-droppers to put a few drops of each container’s solution into the matching cup.
- Place the cups in a warm, sunny place and leave them until the liquid has evaporated. What do you see?
You can try this activity with other crystalline substances as well.
What’s happening?
When a solid (or ‘solute’) is dissolved in the water until no more dissolves, the solution is ‘saturated’. The amount of substance that dissolves in water increases with temperature. As the solution cools back down to room temperature, there is now more solute in the water than would normally be the case – the solution is ‘supersaturated’.
As the water evaporates, the solute precipitates out of solution in the form of crystals. This is an example of crystallisation. You will notice that each precipitate forms slightly different crystals: they might be different in size and shape. The size and shape of a crystal depend on a number of factors including chemical formula, temperature and pressure. In general, crystals that form slowly tend to be larger than crystals that form quickly.
Slime
You will need
- Cornflour
- Food colouring
- Small mixing bowl
- Plastic spoon
- Water
What to do
- Pour some cornflour into a mixing bowl.
- Stir in small amounts of water until the cornflour has become a very thick paste.
- To make the slime the colour of your choice, thoroughly stir about five drops of food colouring into the mixture.
- Stir your slime REALLY slowly. This shouldn’t be hard to do.
- Stir your slime REALLY fast. This should be almost impossible.
- Now punch your slime REALLY hard and fast. It should feel like you’re punching a solid.
You can keep your cornflour and water mixture covered in a fridge for several days. If the cornflour settles, you need to stir it to make it work well again.
What’s happening
Anything that flows is called a fluid. This means that both gases and liquids are fluids.
Fluids like water which flow easily are said to have low viscosity, whereas fluids like cold honey which do not flow so easily are said to have a high viscosity.
Cornflour slime is a special type of fluid that doesn’t follow the usual rules of fluid behaviour. When a pressure is applied to slime, its viscosity increases and the cornflour slime becomes thicker.
At a certain point, slime actually seems to lose its flow and behave like a solid. Cornflour slime is an example of a shear-thickening fluid.
The opposite happens in shear-thinning fluids; they get runnier when you stir them or shake them up. For example, when toothpaste is sitting on a toothbrush it is pretty thick, so you can turn the toothbrush upside down and the toothpaste doesn’t fall off.
But if it was that thick when you tried to squeeze it out of the tube, there is no way you could manage it. Fortunately, toothpaste gets runnier when you are squeezing it out of the tube. Other shear-thinning fluids include:
- blood
- paint
- ballpoint pen ink
- nail polish
Although there are lots of shear-thinning and shear-thickening fluids, nobody has a really good idea why they behave the way they do.
The interactions between atoms in the fluids are so complicated that even the world’s most powerful supercomputers can not model what is happening. This can be a real problem for people who design machinery that involves shear-thinning fluids, because it makes it hard to be sure if they will work.
Snot Slime
You will need
- 1 tablespoon of unflavoured gelatine (from supermarkets)
- ½ cup golden syrup or glucose
- 1 tablespoon of salt
- Hot water
- Food colouring
- Heat-proof bowl
What to do
- Place the gelatine and salt in your bowl.
- Add ½ cup of syrup.
- Add ½ cup of hot water. Now is the time to add food colouring if you want icky green or yellow coloured snot.
- Mix every thing together and cool in a fridge for 30 minutes.
- Run a fork through the snotty mixture to see what it looks like. Your mucus will get thicker and thicker as it cools, if it is too thick, you can add more water.
What’s happening?
You have just made a realistic model of your very own snot. Mucus is composed of water, epithelial (surface) cells, dead leukocytes (white blood cells), mucins (large proteins), and inorganic salts. Your home made mucus contains water, salt and proteins (gelatine is animal protein, usually made from beef or pig skin and hooves), almost like real mucus.
The gelatine dissolves in hot water making a thick solution, but is insoluble (won’t dissolve) in cold water. When cooled, the particles swell to make jelly-like goo.
Applications
Mucus has an important role to play in your body. In your nose it traps dust and anything else unwanted in the air. Mucus dries around particles which harden and this means it can take a quick exit out of your body when you blow your nose.
It’s your mucous membrane that makes snot, and this lines the inside of your nose and respiratory system. The outermost cells of this membrane produce the thick mucus fluid.
You may think that mucus is only found in your nose, but did you know that you also find it in your mouth, lungs, stomach and intestines!
When you get a common cold, an infection in your upper respiratory tract, your body produces loads more mucus than normal to carry away waste material. When sick, your mucus can change colour/color to yellow or green because of trapped bacteria, virus particles and white blood cells – the causalities of your body fighting the viral or bacterial infection.
Reference:
These experiments are from our partners at CSIRO.

Looking to boost your child’s literacy or mathematics confidence and skills?
Explore Reading Eggs, Mathletics and Mathseeds (for younger learners)

